Hey there! As a supplier of 110v VFD drives, I often get asked about how to connect multiple motors to a 110v VFD drive. It's a common question, and I'm here to break it down for you in a way that's easy to understand.
First off, let's talk about what a VFD drive is. A Variable Frequency Drive, or VFD for short, is a device that controls the speed of an electric motor by adjusting the frequency and voltage supplied to it. This allows for more precise control of the motor's speed and torque, which can lead to energy savings and improved performance.
Now, when it comes to connecting multiple motors to a 110v VFD drive, there are a few things you need to keep in mind. The first thing is to make sure that the VFD drive you're using is capable of handling the total load of all the motors you want to connect. You can find this information in the VFD drive's specifications. Look for the rated power, current, and horsepower of the drive, and compare it to the combined power requirements of your motors.
Another important consideration is the type of motors you're using. Not all motors are compatible with VFD drives. You need to use VFD Compatible Motor. These motors are designed to work with the variable frequency and voltage output of a VFD drive. Using non-compatible motors can lead to overheating, reduced lifespan, and other problems.
Once you've confirmed that your VFD drive can handle the load and you're using compatible motors, it's time to start the connection process. Here's a step-by-step guide on how to do it:
Step 1: Disconnect the Power
Before you start working on any electrical equipment, safety should be your top priority. Make sure to disconnect the power supply to the VFD drive and all the motors. This will prevent any electrical shocks or short circuits.
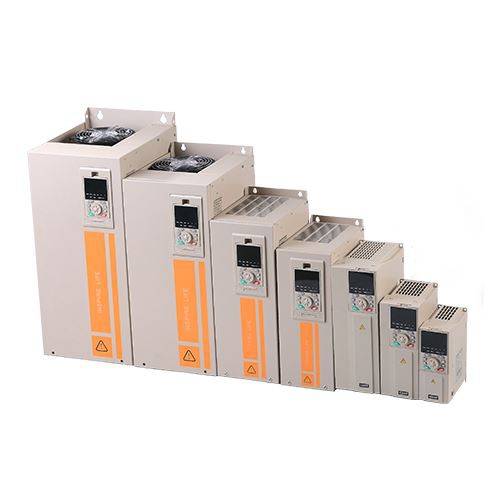
Step 2: Mount the VFD Drive
Find a suitable location to mount the VFD drive. It should be in a well-ventilated area away from heat sources, moisture, and dust. You can use the mounting holes on the VFD drive to secure it to a wall or a panel.
Step 3: Connect the Input Power
Connect the 110v AC power supply to the input terminals of the VFD drive. Make sure to follow the wiring diagram provided in the VFD drive's manual. Usually, there are terminals labeled L1, L2, and sometimes L3 for three-phase power. For a single-phase 110v supply, you'll connect to the appropriate single-phase terminals.
Step 4: Connect the Motors
Now, it's time to connect the motors to the VFD drive. The output terminals of the VFD drive are usually labeled U, V, and W. Connect the motor leads to these terminals. It's important to note that the motors should be connected in parallel. This means that the U terminal of each motor is connected to the U terminal of the VFD drive, the V terminal of each motor is connected to the V terminal of the VFD drive, and the W terminal of each motor is connected to the W terminal of the VFD drive.
Step 5: Configure the VFD Drive
Once the physical connections are made, you need to configure the VFD drive to work with your motors. This involves setting parameters such as the motor rated power, rated current, rated speed, and other relevant settings. You can do this using the keypad or the programming interface of the VFD drive. Refer to the VFD drive's manual for detailed instructions on how to configure these parameters.
Step 6: Test the System
After configuring the VFD drive, it's time to test the system. Reconnect the power supply and slowly increase the speed of the motors using the VFD drive's control interface. Monitor the motors for any abnormal noises, vibrations, or overheating. If everything seems to be working fine, you're good to go!
There are also some advanced VFD drives available, such as Vector Control VFD. These drives offer more precise control of the motor's speed and torque, which can be beneficial in applications where high performance is required.
If you're planning to use the VFD drive in an outdoor environment, you might want to consider an Outdoor VFD. These drives are designed to withstand harsh weather conditions, dust, and moisture.
In some cases, you might encounter issues when connecting multiple motors to a VFD drive. Here are some common problems and their solutions:
Problem 1: Motor Overheating
If the motors are overheating, it could be due to a few reasons. First, check if the motors are compatible with the VFD drive. If not, you need to replace them with compatible motors. Also, make sure that the VFD drive is properly configured and that the motors are not overloaded.
Problem 2: Vibration or Noise
Excessive vibration or noise from the motors can be caused by incorrect wiring, misaligned motors, or improper VFD drive settings. Check the wiring connections to make sure they are correct. Also, make sure that the motors are properly aligned and that the VFD drive is configured to the correct motor parameters.

Problem 3: VFD Drive Tripping
If the VFD drive keeps tripping, it could be due to an overcurrent condition, a short circuit, or a problem with the VFD drive's internal components. Check the wiring for any short circuits and make sure that the motors are not drawing more current than the VFD drive can handle. If the problem persists, you might need to contact a professional technician for further diagnosis.
In conclusion, connecting multiple motors to a 110v VFD drive is not overly complicated as long as you follow the proper steps and take the necessary precautions. It's important to use compatible motors, properly configure the VFD drive, and ensure that the VFD drive can handle the total load of all the motors.
If you're interested in purchasing a 110v VFD drive or have any questions about the connection process, feel free to reach out to us. We're here to help you make the right choice for your application.
References:
- Electrical Installation Handbook
- Variable Frequency Drive Manufacturer's Manuals